公開日:2020/03/12更新日:2020/08/03
【Kotlin基礎】TableLayoutでViewを格子状に並べる方法を解説

- Viewを格子状に並べる方法が知りたい
- TableViewを動的に実装する方法が知りたい
- セルの結合や、空白セルを入れる方法が知りたい
Kotlinでは、TableLayoutを使用することで、Viewを格子状に配置することができます。
本記事では、TableLayoutの基本的な使い方から、セルの結合や隙間を空ける方法などの応用について、サンプルコードを交え、わかりやすく解説しております。
目次
TableLayoutでViewを格子状に並べる方法
KotlinでViewを格子状に配置するには、、TableLayoutを使用します。
【公式ドキュメント】 : TableLayout | Android Developers
TableLayoutを実装するには、xmlで実装する方法と、コードで動的に実装する方法の、2通りの方法があります。
xmlでTableLayoutを実装する
まずは、xmlで実装する方法を紹介致します。xmlで実装するには、以下のように実装します。
- MainActivity.kt
- activity_main.xml
class MainActivity : AppCompatActivity() {

   override fun onCreate(savedInstanceState: Bundle?) {
       super.onCreate(savedInstanceState)
       setContentView(R.layout.activity_main)
   }
}
<?xml version="1.0" encoding="utf-8"?>
<TableLayout
   xmlns:android="http://schemas.android.com/apk/res/android"
   android:id="@+id/container"
   android:layout_width="match_parent"
   android:layout_height="match_parent">

   <TableRow
       android:layout_width="match_parent"
       android:layout_height="wrap_content">
       <Button
           android:text="1-1"
           android:layout_width="wrap_content"
           android:layout_height="wrap_content"/>
       <Button
           android:text="1-2"
           android:layout_width="wrap_content"
           android:layout_height="wrap_content"/>
       <Button
           android:text="1-3"
           android:layout_width="wrap_content"
           android:layout_height="wrap_content"/>
   </TableRow>

   <TableRow
       android:layout_width="match_parent"
       android:layout_height="wrap_content">
       <Button
           android:text="2-1"
           android:layout_width="wrap_content"
           android:layout_height="wrap_content"/>
       <Button
           android:text="2-2"
           android:layout_width="wrap_content"
           android:layout_height="wrap_content"/>
       <Button
           android:text="2-3"
           android:layout_width="wrap_content"
           android:layout_height="wrap_content"/>
   </TableRow>

   <TableRow
       android:layout_width="match_parent"
       android:layout_height="wrap_content">
       <Button
           android:text="3-1"
           android:layout_width="wrap_content"
           android:layout_height="wrap_content"/>
       <Button
           android:text="3-2"
           android:layout_width="wrap_content"
           android:layout_height="wrap_content"/>
       <Button
           android:text="3-3"
           android:layout_width="wrap_content"
           android:layout_height="wrap_content"/>
   </TableRow>
</TableLayout>

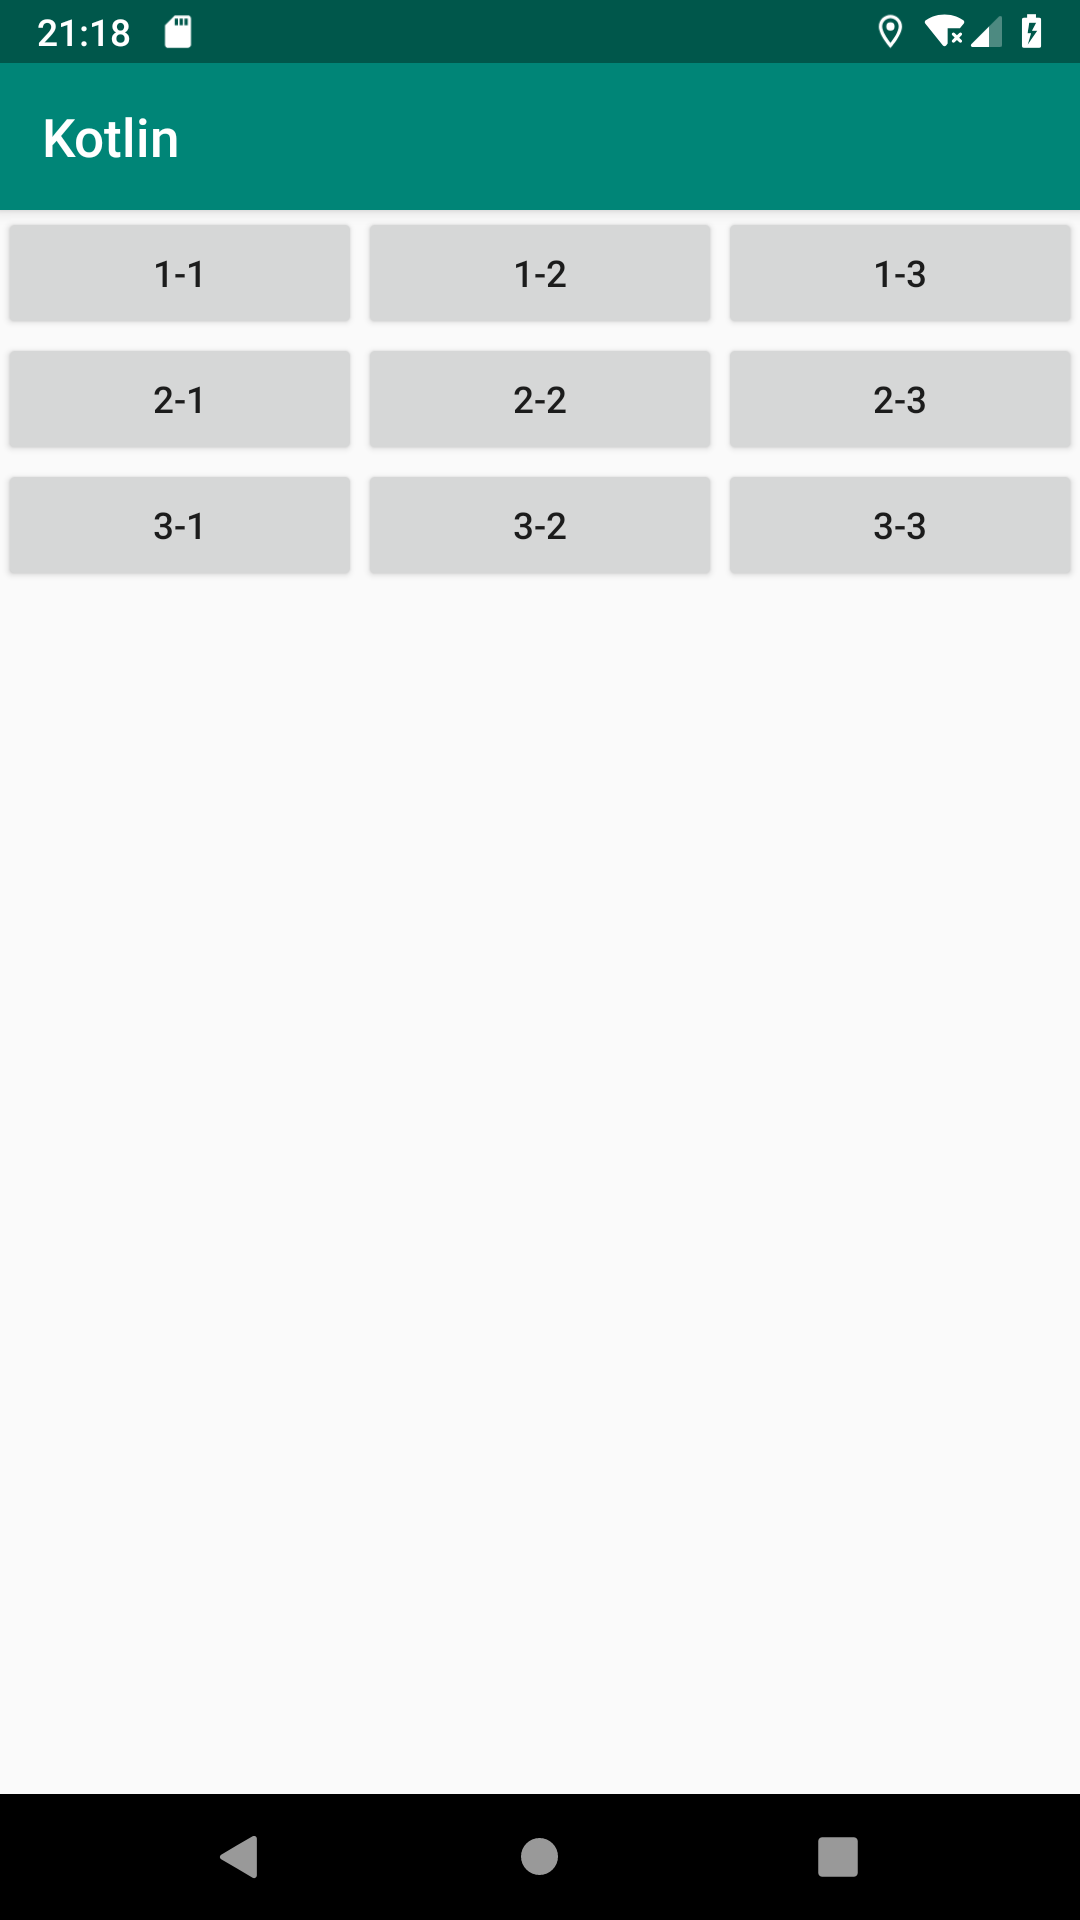
TableLayoutを実装するには、<TableLayout/>タグを使用します。
TableLayoutは、1行ごとに、<TableRow/>タグで区切ります。TableRow内に実装されたViewが、TableLayoutの各セルとなります。
- xmlでTableLayoutを実装するには、<TableLayout/>タグを使用する
- 1行ごとに、TableRowで区切る
コードで動的にTableLayoutを実装する
続いて、コードで動的に実装する方法を紹介致します。コードで動的に実装するには、以下のように実装します。
- MainActivity.kt
class MainActivity : AppCompatActivity() {

   override fun onCreate(savedInstanceState: Bundle?) {
       super.onCreate(savedInstanceState)

       // TableLayoutの生成
       val tableLayout = TableLayout(this).also {

           // 1行目
           val tableRow1 = TableRow(this).also {
               val button1_1 = Button(this)
               button1_1.text = "1-1"
               val button1_2 = Button(this)
               button1_2.text = "1-2"
               val button1_3 = Button(this)
               button1_3.text = "1-3"

               it.addView(button1_1)
               it.addView(button1_2)
               it.addView(button1_3)
           }

           // 2行目
           val tableRow2 = TableRow(this).also {
               val button2_1 = Button(this)
               button2_1.text = "2-1"
               val button2_2 = Button(this)
               button2_2.text = "2-2"
               val button2_3 = Button(this)
               button2_3.text = "2-3"

               it.addView(button2_1)
               it.addView(button2_2)
               it.addView(button2_3)
           }

           // 3行目
           val tableRow3 = TableRow(this).also {
               val button3_1 = Button(this)
               button3_1.text = "3-1"
               val button3_2 = Button(this)
               button3_2.text = "3-2"
               val button3_3 = Button(this)
               button3_3.text = "3-3"

               it.addView(button3_1)
               it.addView(button3_2)
               it.addView(button3_3)
           }

           // TableLayoutに各行を設定
           it.addView(tableRow1)
           it.addView(tableRow2)
           it.addView(tableRow3)
       }

       // TableLayoutをレイアウトに設定
       setContentView(tableLayout)
   }
}
TableLayout()で、TableLayoutのインスタンスを生成しております。
そして、生成したtableLayoutのインスタンスに対し、スコープ関数alsoを使用し、TableRowを子Viewとして追加しております。
TableRowには、それぞれButtonを子Viewとして追加しております。
スコープ関数alsoの詳細については、以下の記事に詳しくまとめておりますので、そちらをご覧ください。

最後に、setContentView()で、TableLayoutをレイアウトとして登録しております。
- コードで動的にTableLayoutを実装するには、TableLayout()でインスタンスを生成した後、setContentView()でレイアウトとして登録する
TableLayoutのカスタマイズ
Viewを画面いっぱいに表示する
続いて、セルの幅を調節し、画面幅一杯にTableLayoutを表示する方法を紹介致します。画面幅一杯にTableLayoutを表示するには、セルのViewに対し、layout_weightを指定します。
- MainActivity.kt
<?xml version="1.0" encoding="utf-8"?>
<TableLayout
   xmlns:android="http://schemas.android.com/apk/res/android"
   android:id="@+id/container"
   android:layout_width="match_parent"
   android:layout_height="match_parent">

   <TableRow
       android:layout_width="match_parent"
       android:layout_height="wrap_content">
       <Button
           android:text="1-1"
           android:layout_width="0dp"
           android:layout_height="wrap_content"
           android:layout_weight="1"/>
       <Button
           android:text="1-2"
           android:layout_width="0dp"
           android:layout_height="wrap_content"
           android:layout_weight="1"/>
       <Button
           android:text="1-3"
           android:layout_width="0dp"
           android:layout_height="wrap_content"
           android:layout_weight="1"/>
   </TableRow>

   (省略)
</TableLayout>
layout_widthに0dpを指定し、layout_weightに1を指定することで、画面いっぱいに各Viewが均等表示されます。
layout_weightは、比率(重み)でサイズを指定する際に使用されます。3つのボタン全てに1を指定しているため、1 : 1 : 1の割合で表示されております。
- 画面一杯に表示するには、layout_weightを使用する
セルを結合する
続いて、セルを結合する方法を紹介致します。セルを結合するには、layout_spanを指定します。
- MainActivity.kt
<?xml version="1.0" encoding="utf-8"?>
<TableLayout
   xmlns:android="http://schemas.android.com/apk/res/android"
   android:id="@+id/container"
   android:layout_width="match_parent"
   android:layout_height="match_parent">

   <TableRow
       android:layout_width="match_parent"
       android:layout_height="wrap_content">
       <Button
           android:text="1-1"
           android:layout_width="wrap_content"
           android:layout_height="wrap_content"
           android:layout_span="2"/>
       <Button
           android:text="1-3"
           android:layout_width="wrap_content"
           android:layout_height="wrap_content"/>
   </TableRow>

   (省略)
</TableLayout>

layout_spanには、結合するセルの数を指定します。2つ分のセルを結合するため2を指定しております。
- セルを結合するには、layout_spanを使用する
空白セルを表示する
最後に、空白セルを表示する方法を紹介致します。空白セルを表示するには、layout_columnを指定します。
- MainActivity.kt
<?xml version="1.0" encoding="utf-8"?>
<TableLayout
   xmlns:android="http://schemas.android.com/apk/res/android"
   android:id="@+id/container"
   android:layout_width="match_parent"
   android:layout_height="match_parent">

   <TableRow
       android:layout_width="match_parent"
       android:layout_height="wrap_content">
       <Button
           android:text="1-2"
           android:layout_width="wrap_content"
           android:layout_height="wrap_content"
           android:layout_column="1"/>
       <Button
           android:text="1-3"
           android:layout_width="wrap_content"
           android:layout_height="wrap_content"/>
   </TableRow>

   <TableRow
       android:layout_width="match_parent"
       android:layout_height="wrap_content">
       <Button
           android:text="2-1"
           android:layout_width="wrap_content"
           android:layout_height="wrap_content"/>
       <Button
           android:text="2-3"
           android:layout_width="wrap_content"
           android:layout_column="2"/>
   </TableRow>

   (省略)
</TableLayout>
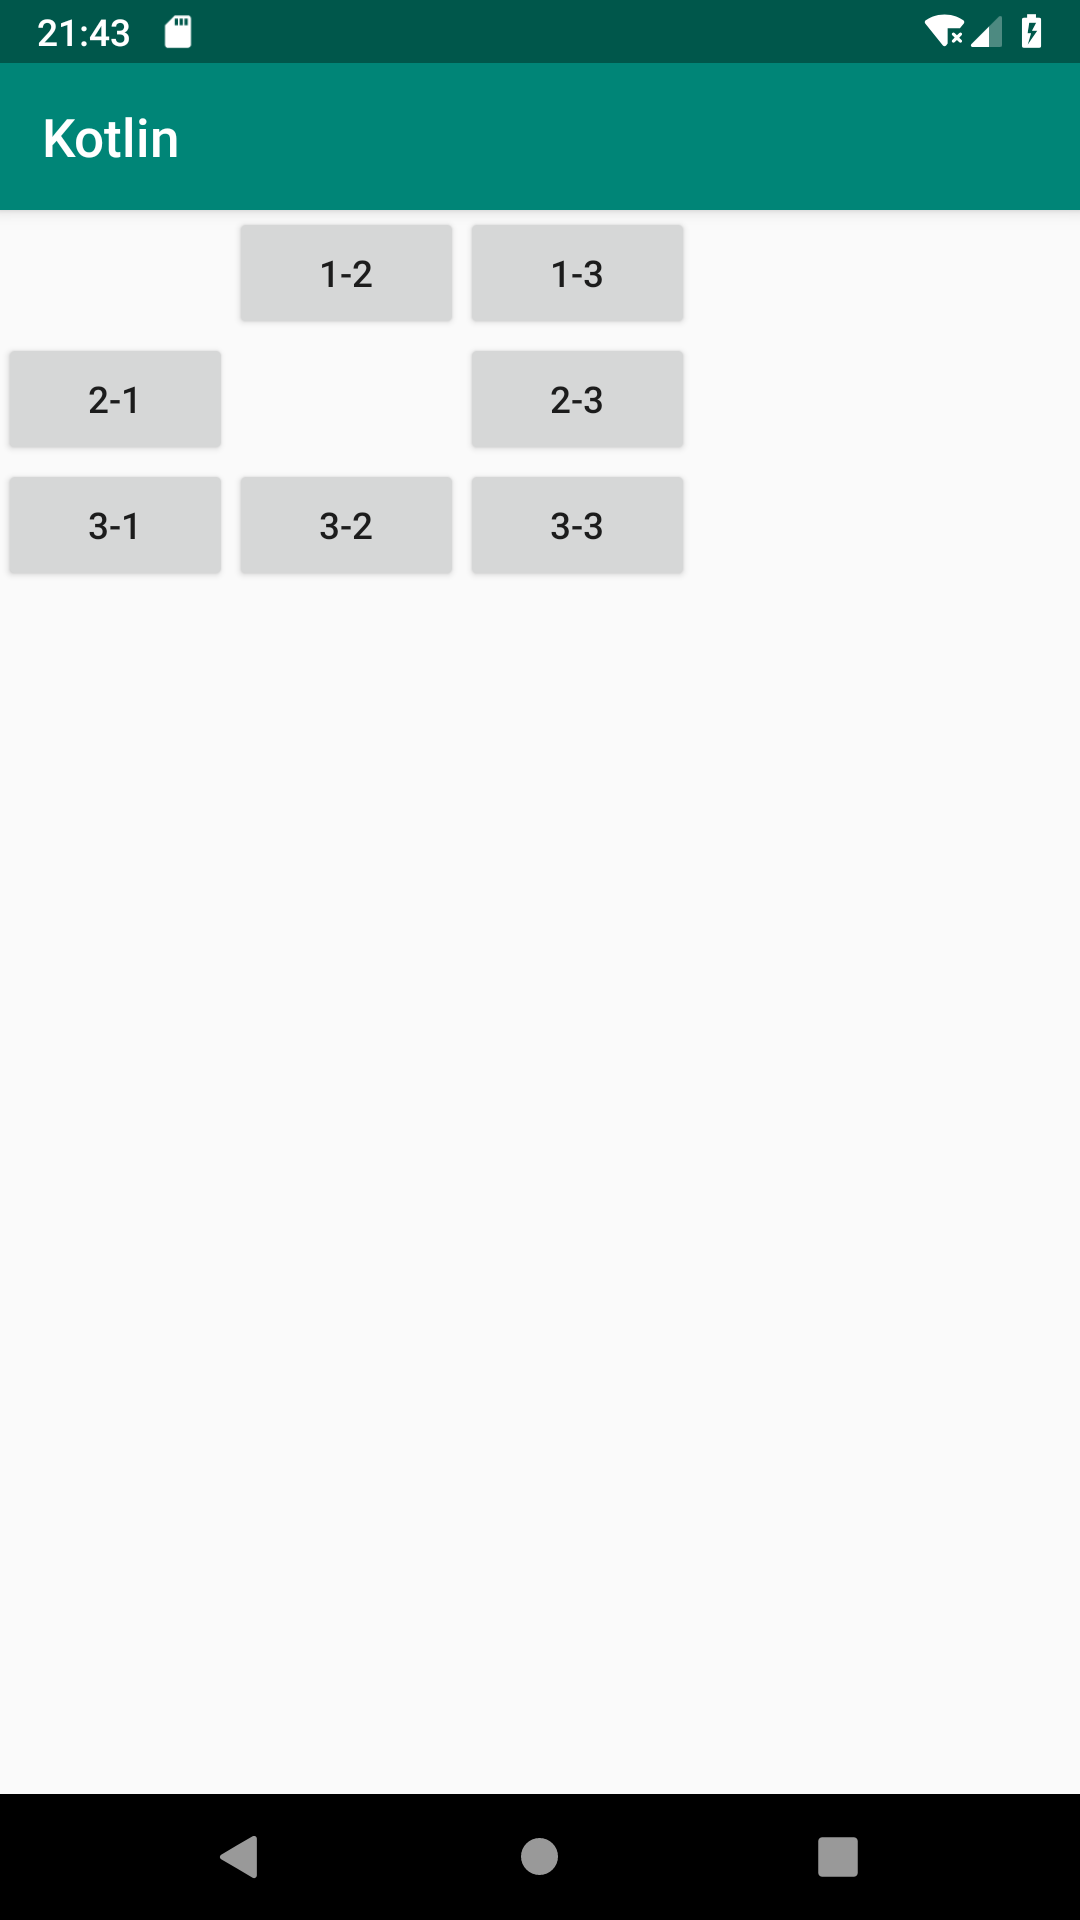
layout_columnには、表示する列の番号を指定します。列は、左から0,1,2,3となっております。
左のセルと間隔があくようにlayout_columnを指定することで、空白セルを表示することができます。
- 空白セルを表示するには、layout_columnを使用する
まとめ

- xmlでTableLayoutを実装するには、<TableLayout/>タグを使用する
- 1行ごとに、TableRowで区切る
- コードで動的にTableLayoutを実装するには、TableLayout()でインスタンスを生成した後、setContentView()でレイアウトとして登録する
- 画面一杯に表示するには、layout_weightを使用する
- セルを結合するには、layout_spanを使用する
- 空白セルを表示するには、layout_columnを使用する
関連記事